Your First Sourdough Boule: Everything You Need to Know
A classic “rustic” Sourdough boule with thick, chewy crust and a tangy fermented flavor. Perfect for toasting in a skillet with butter or olive oil or eating plain with your favorite main dish.
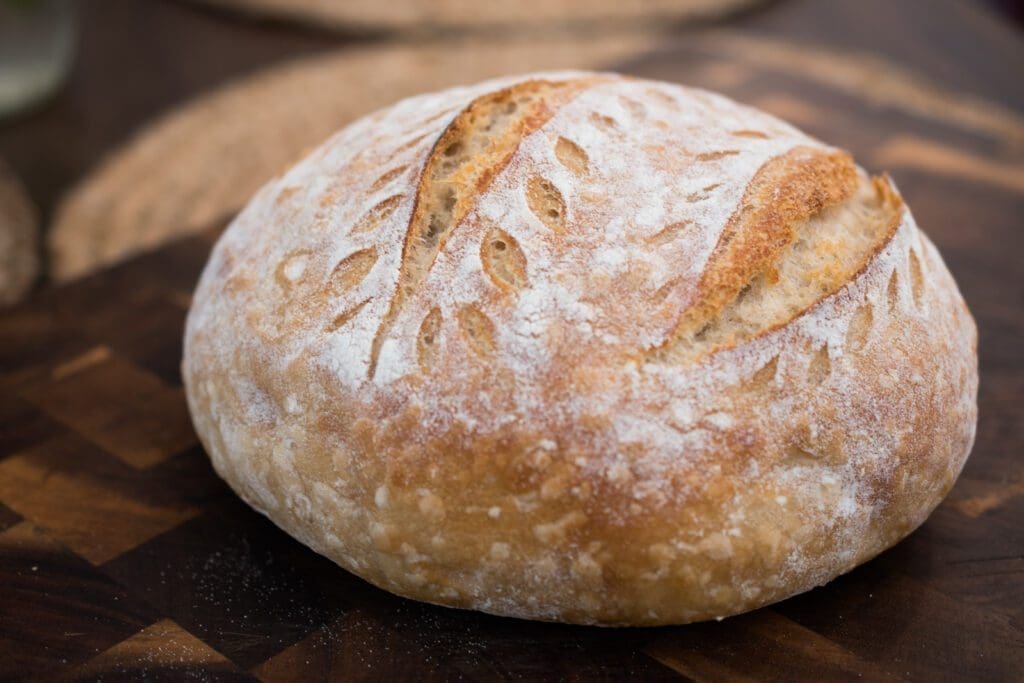
Your First sourdough boule
Making your first sourdough boule is SO exciting! You’ve created your starter, fed and watered it, watched it bubble and come to life, and fretted over it like a new parent. Then, it is finally time to bake and you carefully fold and stretch and shape and wait and say a prayer as you pop it into the oven. When you open that lid and see that it is actually working- the crazy wild yeast that you developed with nothing but flour and water- IS WORKING! It is a magical moment.
Making your first boule can seem overwhelming with all the unfamiliar steps and jargon. You can get really technical with sourdough loaves and there are people who have gotten it down to an exact science! But remember, ancient civilizations were enjoying the amazing benefits of sourdough bread long before kitchen scales and instant read thermometers were even a thing! It’s fun to experiment with all the different elements- and there are a ton- that effect your final loaf. But making artisan sourdough loaves can be as simple as you want it to be.
Stretch and fold
The stretch and fold technique is really simple and saves your arms a TON of work by not having to sit and knead your dough to build up all that wonderful gluten. The important thing is to make sure your hands are wet so that the dough doesn’t stick to your hands. And also to make sure you are gently stretching- NOT tearing your dough. Stretching helps develop and strengthen the gluten in your sough so that you end up with that classic chewy sourdough that is so sought after. Here is a great visual example of how to do the stretch and fold technique.
your sourdough boules need to ‘rest’
When you’re making your first sourdough boule, don’t be tempted to cut down the ‘rest’ time. You can’t rush the magic! The resting periods are just as important as the stretching, folding, and shaping. I find it easiest to get all the way to the last shaping on Day ONE, then leave the loaves to ferment in the fridge and gain volume overnight. Then, on Day TWO, I’m able to turn them out, score them, and pop them into the oven first thing the next morning.
Scoring your first sourdough boule
There are tons of different ways to score, or ‘slash’ your dough before it goes in to the oven. You do this to help the dough with “oven spring” and prevent them from cracking and bursting unpredictably. The score helps your loaf expand and rise evenly. You can use a razor blaze or very sharp knife and do a quick, simple slash down the middle, or try a more elegant pattern. The deeper your cut, the more your boule is going to expand there. You generally want to aim for around 1/4 inch depth. You can experiment with different angles and depths to get the final look that you want.
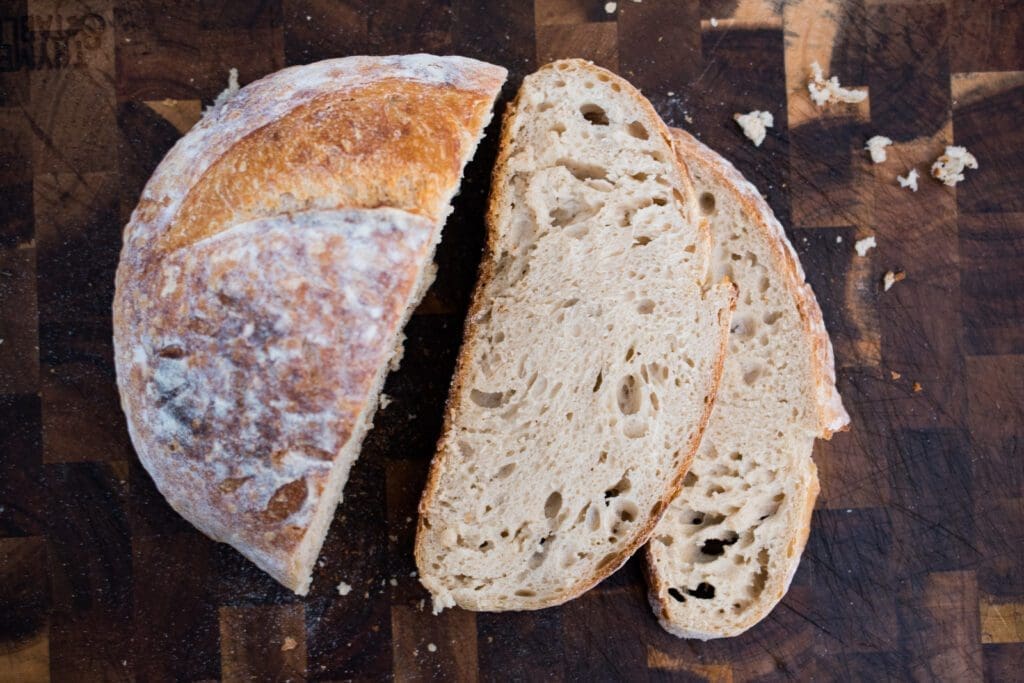
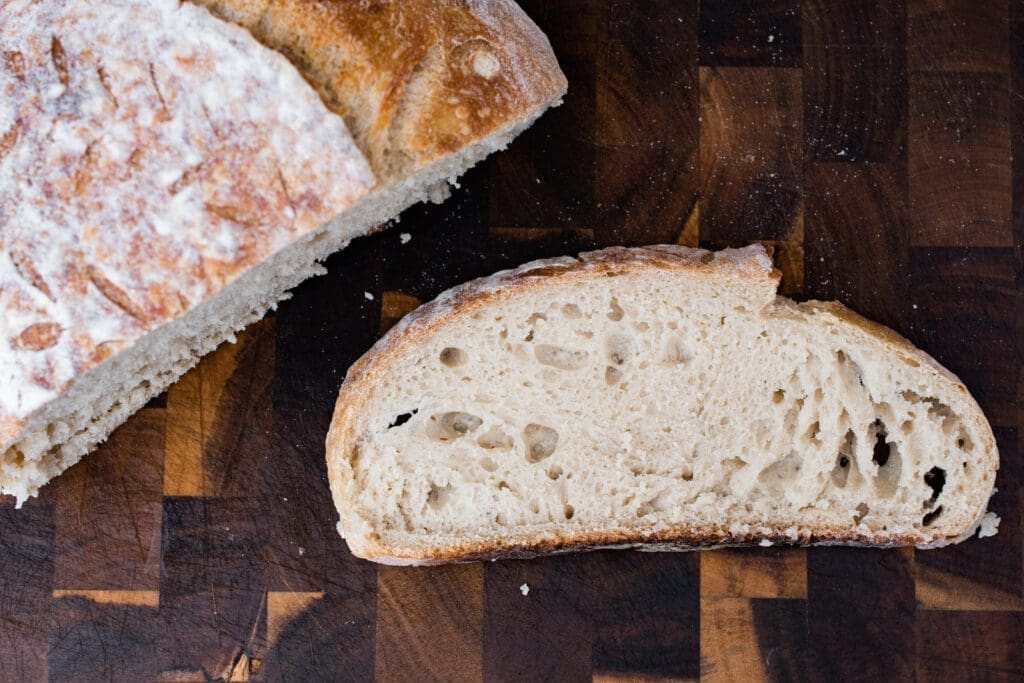
don’t cut into it hot
As much as we all LOVE warm bread straight out of the oven, sourdough is really not ideal for cutting warm. If you do get impatient and cut it before it has had a chance to cool, chances are you will end up with a gummy, sticky loaf. If you want to eat your sourdough warm, I would suggest letting it cool ALL the way to room temperature and then slicing it and reheating. My favorite way to heat sourdough is by throwing it into a buttered cast iron skillet to toast. It softens it up a bit and absorbs the butter, giving it an amazing flavor and texture!
Did you make it? Let me know by leaving a review below or tagging me with a pic on instagram @good.to.gather
Your First Sourdough Boule
Equipment
- 1 bench scraper
- 1 Dutch oven with lid
- 2 proofing baskets
- 2 sheets parchment paper
Ingredients
- 1 1/4 Cups Active Starter, fed + risen +bubbly 250 grams
- 3 Cups + 3 Tbsp Room Temperature Water 750 grams
- 6 Cups Unbleached All-Purpose Flour 816 grams
- 2 Cups + 3 Tbsp Bread Flour 264 grams
- 4 tsp Salt 24 grams
- ` sprinkle rice flour for dusting optional
Instructions
- Measure out the starter and lukewarm water into a mixing bowl and mix together until the starter sort of "dissolves".
- Next add your flour and using your hands, mix it all together for a few minutes until it is nice and incorporated. The dough will be very sticky. Cover it with a towel and let it sit on the counter for two hours.
- After your rest (also called an autolyze), add your salt and wet your hands before pinching in the salt until it is all mixed together. Now, you are going to do a series of "Stretch and Folds". With wet hands, pick up the dough on the top edge and gently stretch it and fold it back toward you over the dough. Repeat this on the left, right, and bottom- stretching out and then folding back over the top. Repeat this for 2-3 minutes.
- Set a 20 minute timer to let the dough rest, then repeat one more set of stretch and folds for 2-3 minutes.
- Let the dough rest for 2 more hours.
- After the dough has rested, it is ready to be shaped. Dump it out on the counter and using a bench scraper, separate the dough in half.
- Starting with the first loaf, gently spread it out into the shape of a rectangle. Fold in one side to the middle. then fold the other side on top, creating a trifold- like a bulletin. Then, starting at one end, roll the dough up into a neat, tightly packed ball. With both hands, tuck the your hands underneath the dough on the side farthest you and drag the dough toward you to create tension on the surface of the dough. Spin the dough and do this again a few times until the dough is smooth and uniform in shape. This make take a little time to perfect! Repeat with the second loaf.
- Let the loaves "rest" again for 20 minutes, then reshape them again- stretching gently this time into a rectangle and folding over into a trifold shape. Roll the dough starting at one end and then tuck and roll toward you to create tension and shape. Do this with both loaves.
- This time after shaping, pick up each loaf and turn it upside down into a lightly floured (rice flour works best!) proofing basket.
- Cover both baskets with a towel and place into the refrigerator for 4 hours- or overnight.
- When you get ready to bake, preheat your oven (with your Dutch oven inside) to 450.
- When the Dutch oven is hot and your oven reaches 450, flip the dough out of the basket gently onto a piece of parchment paper. Score your sourdough with a sharp knife or double-edged razorblade. Then, transfer the loaf into the hot Dutch oven. Place the lid on and bake for 25 minutes.
- After 25 minutes, remove the lid and bake for 25 -30 minutes more or until desired color is reached.
- Remove the loaf and wrap it in a thick towel to rest. Let it rest AT LEAST 2 hours. If you cut into it hot it will be gummy.
- Congrats! You just made your first sourdough loaf. You're officially a sourdough baker!
I’ve used this recipe a few times and it’s by far my favorite for a yummy sourdough loaf. The steps are easy to follow and keep up with. Not overwhelming like a lot of sourdough recipes! The end result was delicious!
Hello! Thank you so much for this recipe. Getting ready to try it. I have a question though. Do I transfer the loaf in the Dutch oven with the parchment paper to bake?
Hi Vera!
Yes. You want to preheat the Dutch oven with the lid on. Then pull it out and place the prepared boule AND the parchment paper inside the preheated Dutch oven. Place the lid on and bake!
Thank you so much for your quick response. I’m on the day 4 of my sourdough starter from your blog. Fingers crossed:) If I get it right, hopefully I’ll get to make that bread!
I don’t have a dutch oven. How do I cook it without one?
Hi Robert! You could use a cast iron with a lid. It just has to be able to conduct heat really well and trap steam for a portion of the cooking time.
Hello Callie, Can I use mostly whole wheat flour in this recipe? Just add the bread flour to it? Thank you! Kathi
You can use wheat, but know that it absorbs more water than white so you may want to add slightly less wheat flour than the recipe calls for OR add slightly more water to account for the difference.
Tomorrow will be day 15!! Must I use all purpose and bread flours to make my boule or may I continue with just whole wheat?
Ann, you can use Wheat flour. It will just absorb more liquid and produce a slightly more dense and sticky loaf. But delicious!